


Product exchange: return and new items on the same receipt
Take back the product the customer brought and sell the replacement on the same receipt; the difference is collected from the customer or paid back to them.
When a customer brings back a product and wants another one instead, you don't need to do the return and the new sale separately. With Exchange you do both on the same receipt; the app works out the difference and shows the amount to collect from the customer or to pay back to them.
Making an exchange
Open Exchange
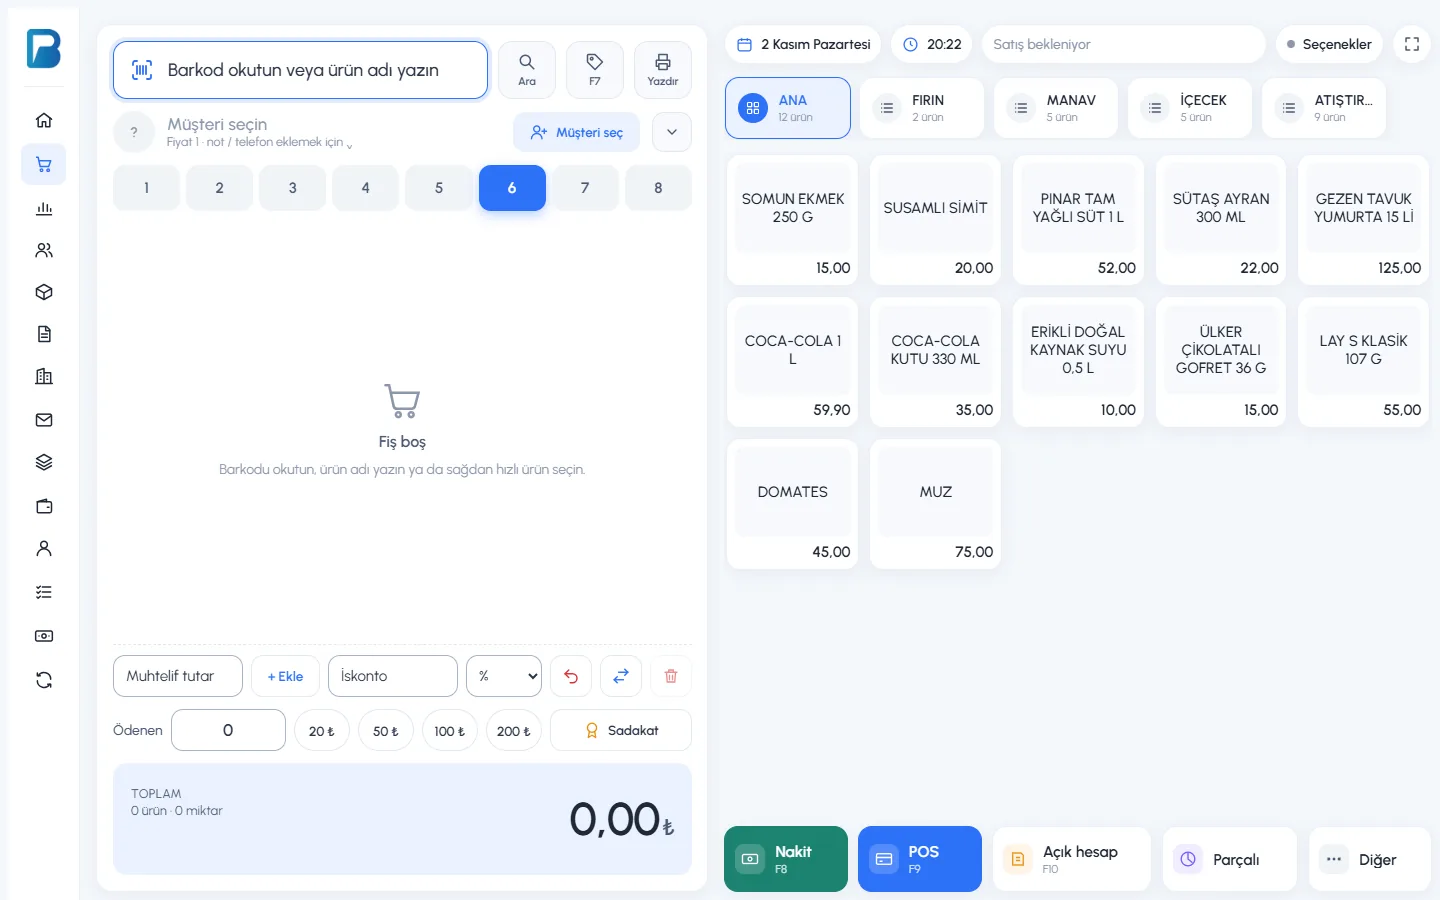
On the sales screen, press the 1 Exchange button below the receipt. A thin Exchange bar opens above the receipt.
 1
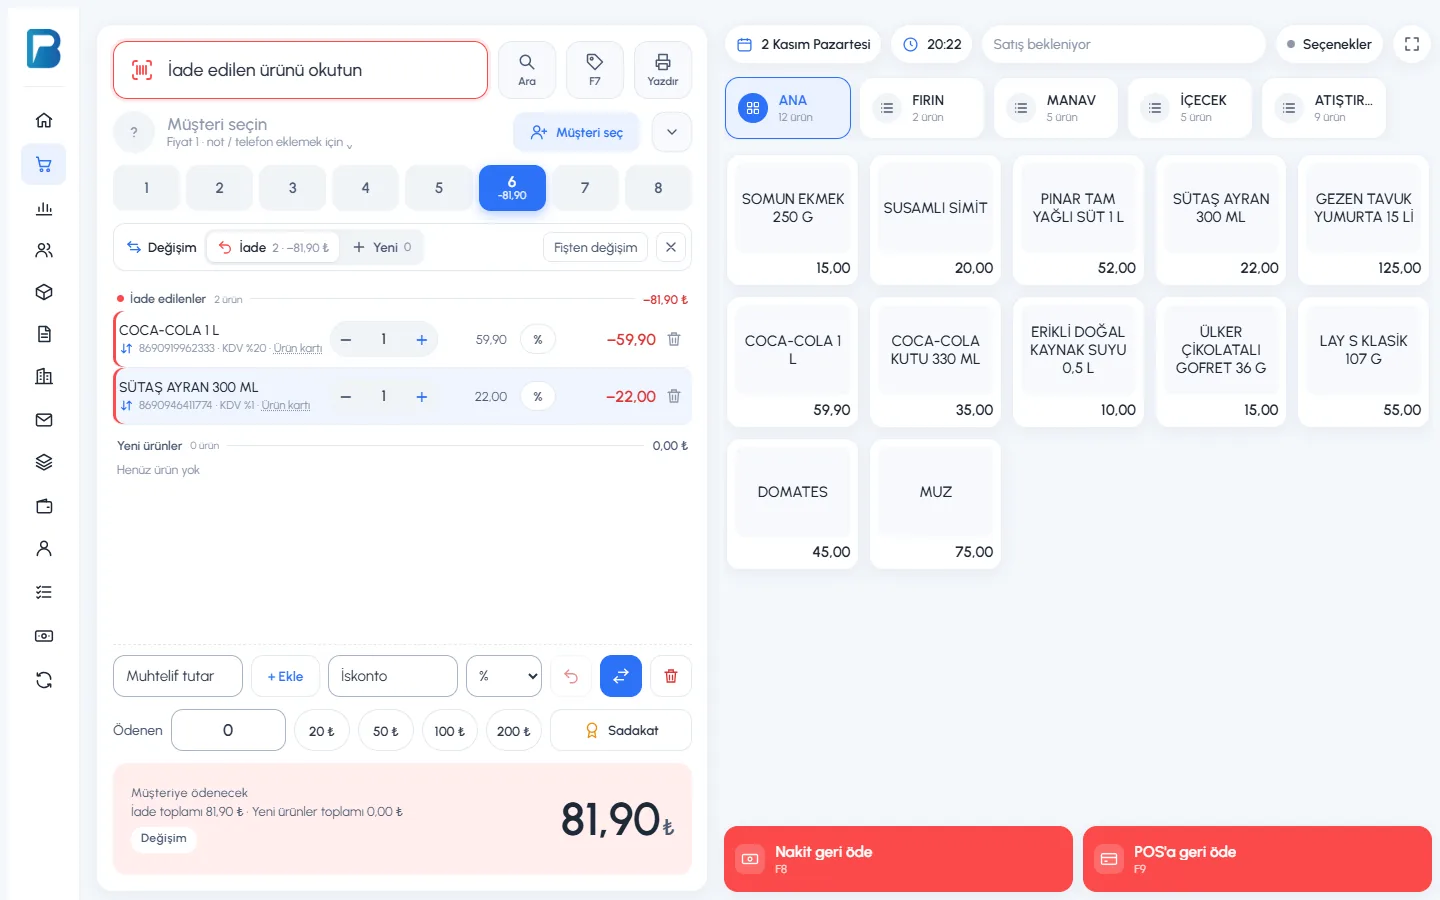
Scan the products the customer brought back
1 Return is selected on the bar; the barcode box shows 3 "Scan the returned product". The products you scan are added to the 2 Returned items list with a minus amount.
 123
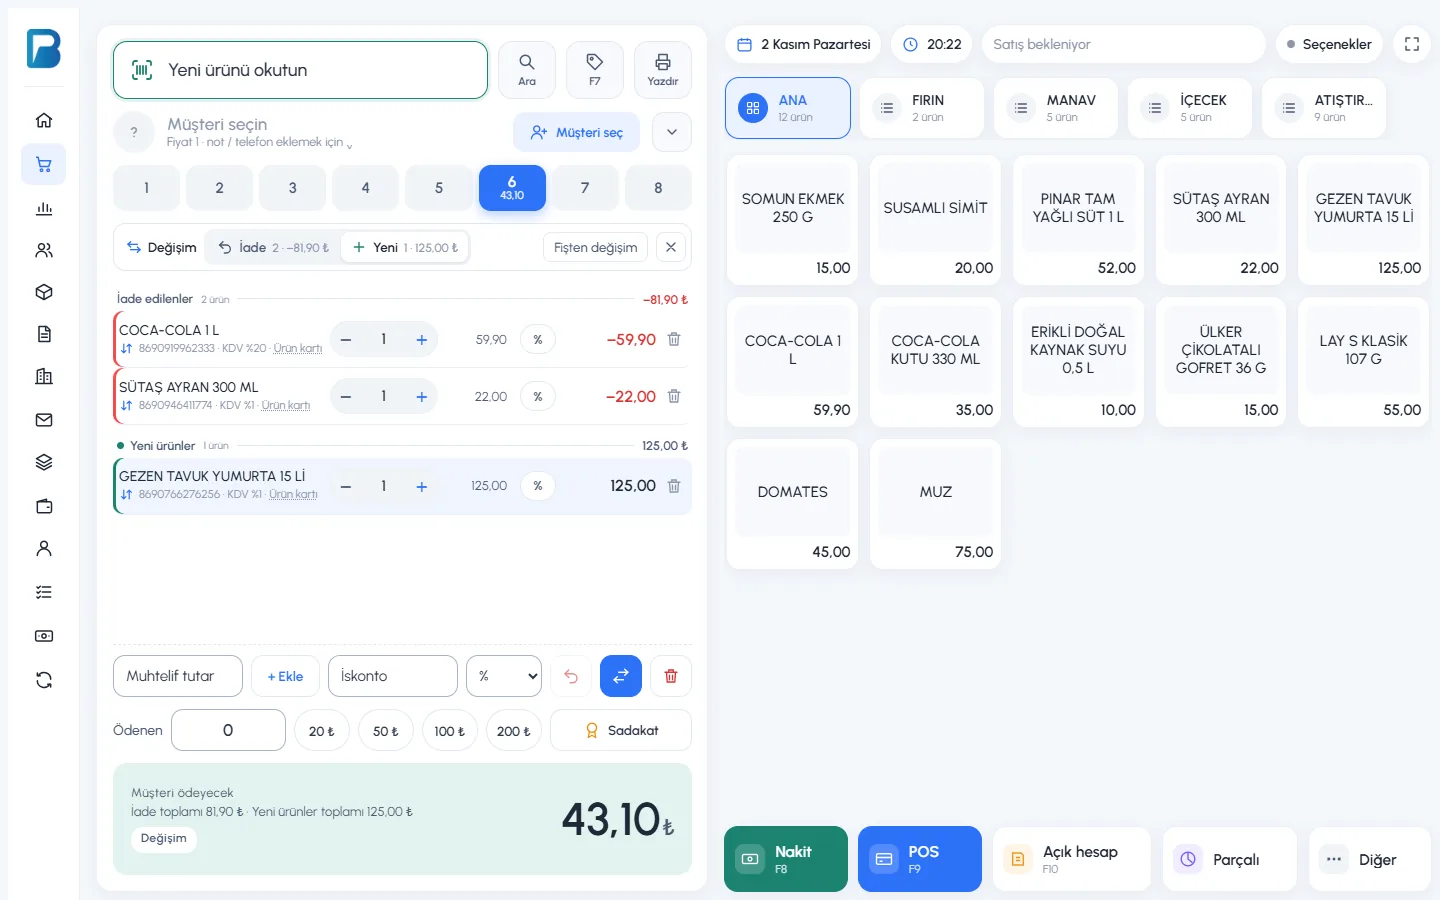
Scan the products they are taking instead
Press 1 New on the bar; the barcode box shows "Scan the new product". The products you scan are added to the 2 New items list. At the bottom you see 3 the difference: Customer pays. Take the difference with the 4 usual payment buttons (Cash, Card, On account, Split).
 1234
If the customer gets money back
If the returned products cost more than the new ones, 1 Pay to customer appears at the bottom. Depending on how you give the money back, press 2 Refund in cash or 3 Refund to card (POS). If there is no difference, a single button appears: Complete exchange.
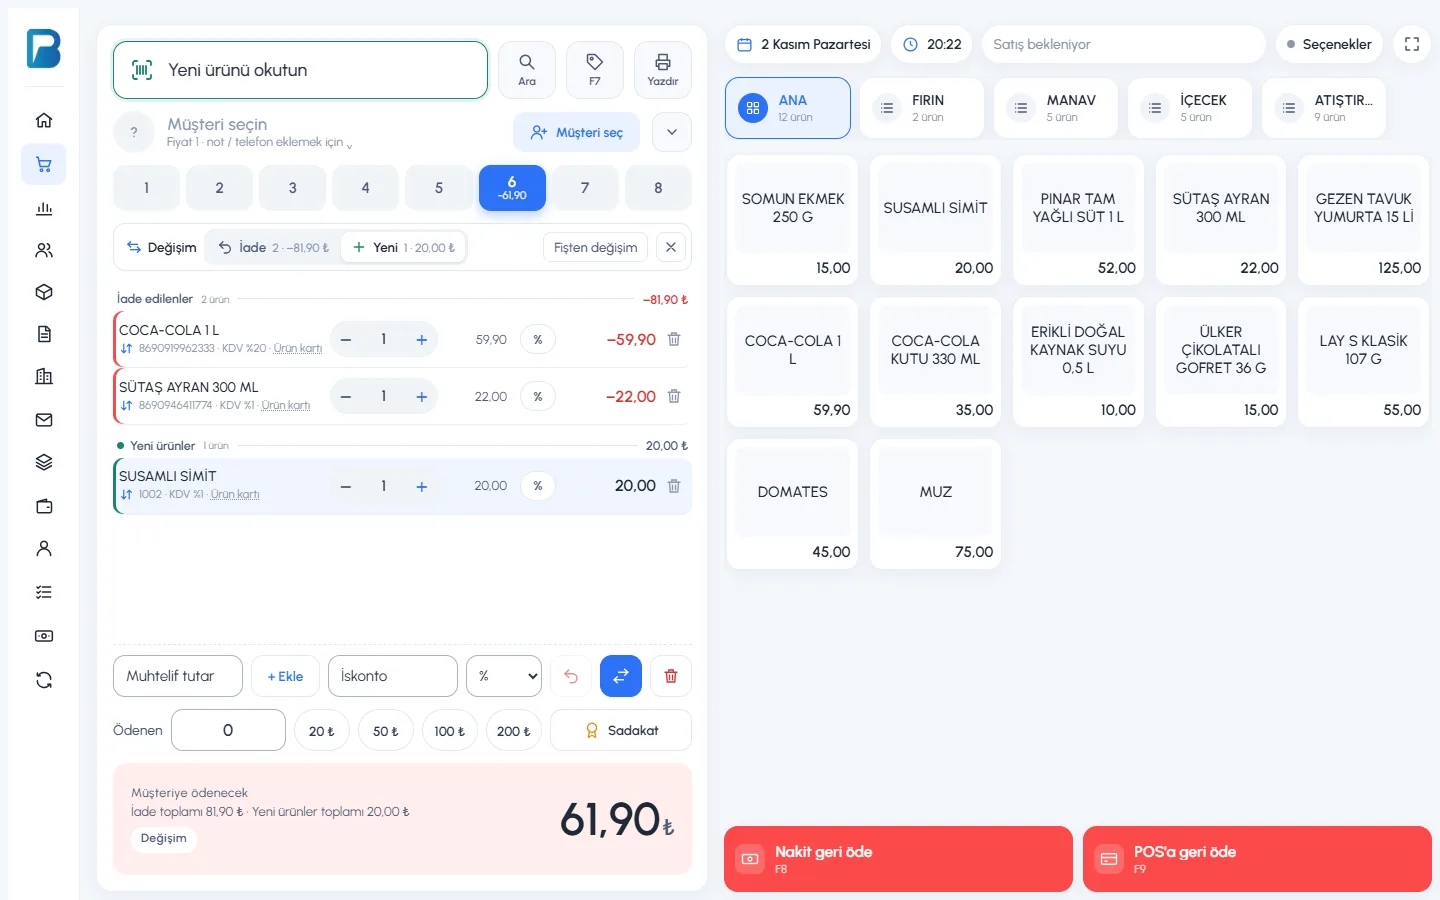 1234
Check the result
The Exchange completed card shows 1 the return number, the return amount and the difference collected from or paid to the customer. From here you can print the receipt for the new sale and the Return receipt.
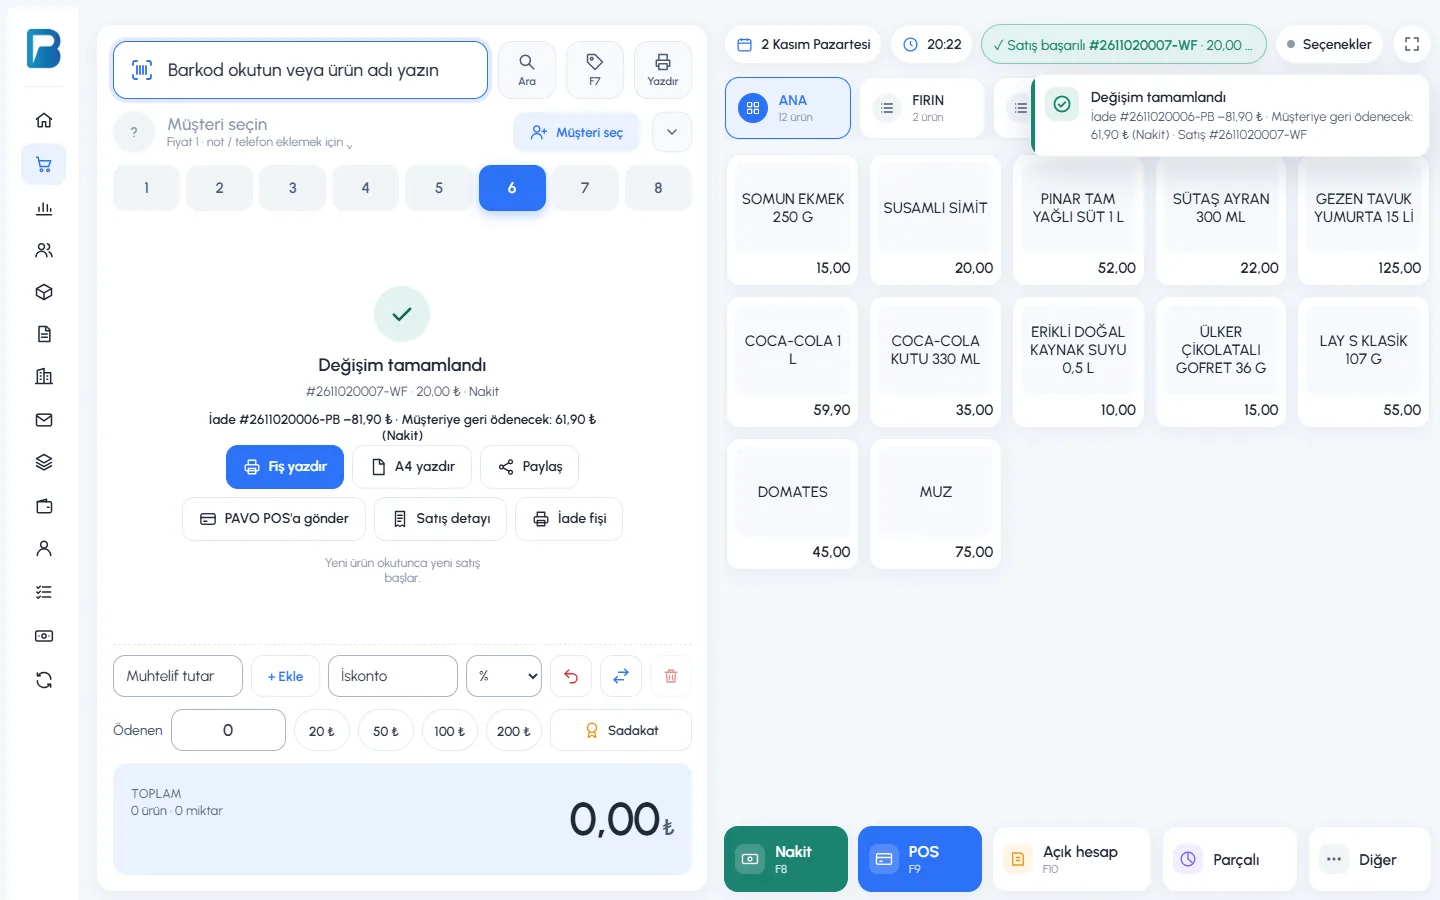 1
- If you scanned a product into the wrong list, press the 4 small arrow icon on its line; the product moves to the other list.
- Clicking a list heading (Returned items / New items) also selects the list that scanned products go to.
- To cancel the exchange, press the ✕ on the right of the bar.
An exchange is saved as two separate records: a return and a sale. In reports they appear like a normal return and sale, and stock moves correctly for both. An exchange requires permission to accept returns and to make sales.
If the customer brought the receipt (exchange from receipt)
Find the receipt
Press Exchange from receipt on the bar. 1 Type the receipt number (sale code) or scan the receipt's barcode, and press Find. The receipt's date, customer and payment type are shown; press 2 Continue with this receipt.
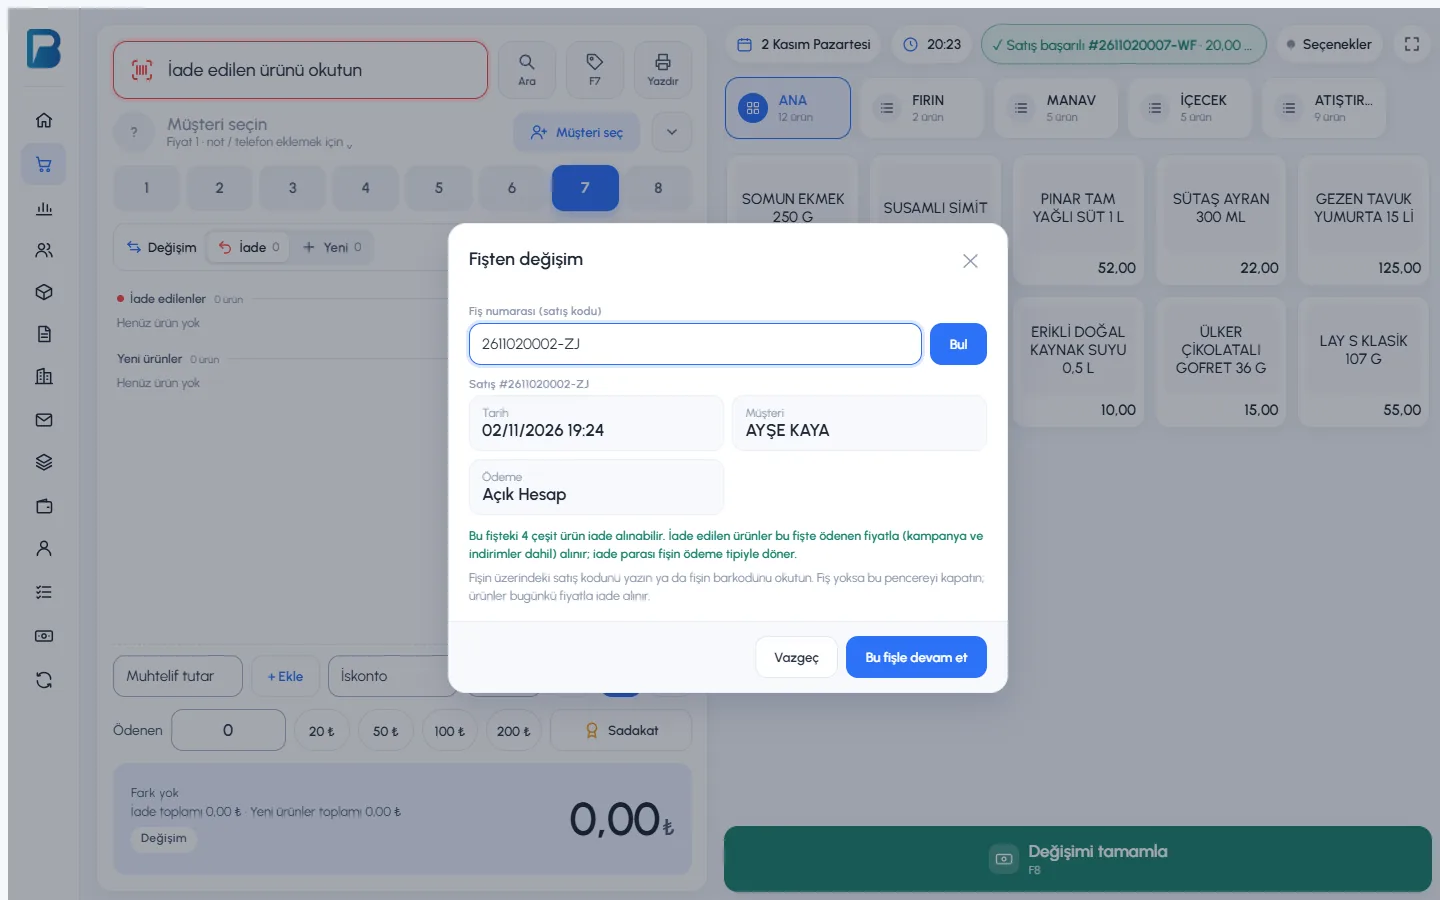 12
Scan the returned products
The bar shows 1 Receipt #…. Only products on this receipt can be returned, and they are added to the list 2 at the price paid on the receipt (including campaigns and discounts). Then scan the new products as above and complete the exchange.
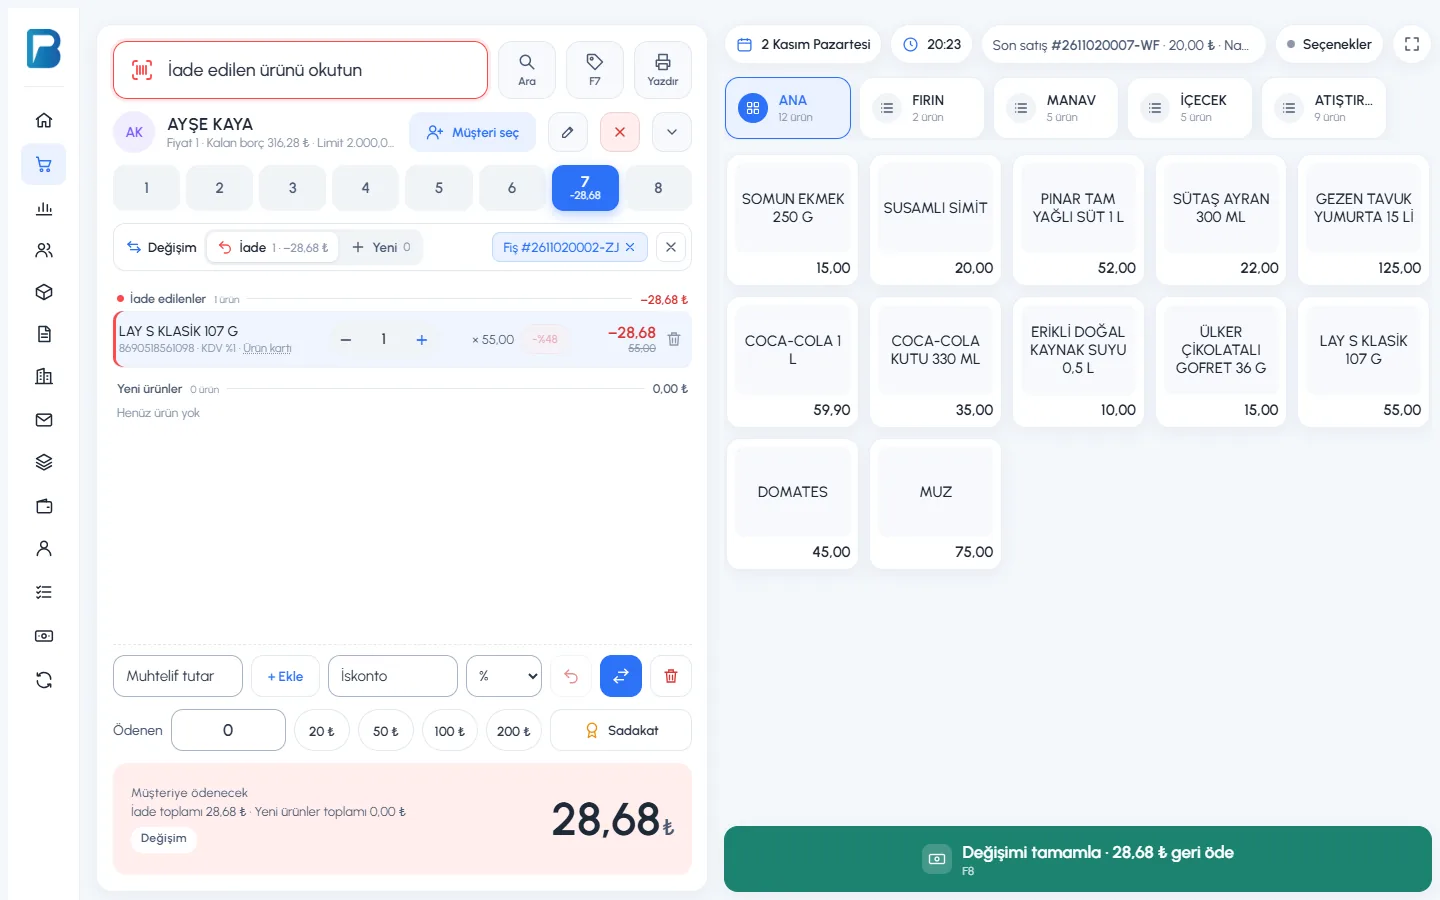 12
- In an exchange from receipt, the refund goes back with the receipt's payment type; if the receipt was on account, the refund amount is deducted from the customer's account.
- You can't return more units than are left on the receipt.
- To remove the receipt, press the Receipt #… button on the bar.
Exchange works the same way in the desktop app.
Open Exchange
On the sales screen, press the 1 Exchange button below the receipt (to the right of Return mode). A thin bar opens above the receipt: the Return / New choice and, on the right, Exchange from receipt. Returned items and new items are listed one below the other on the same receipt.
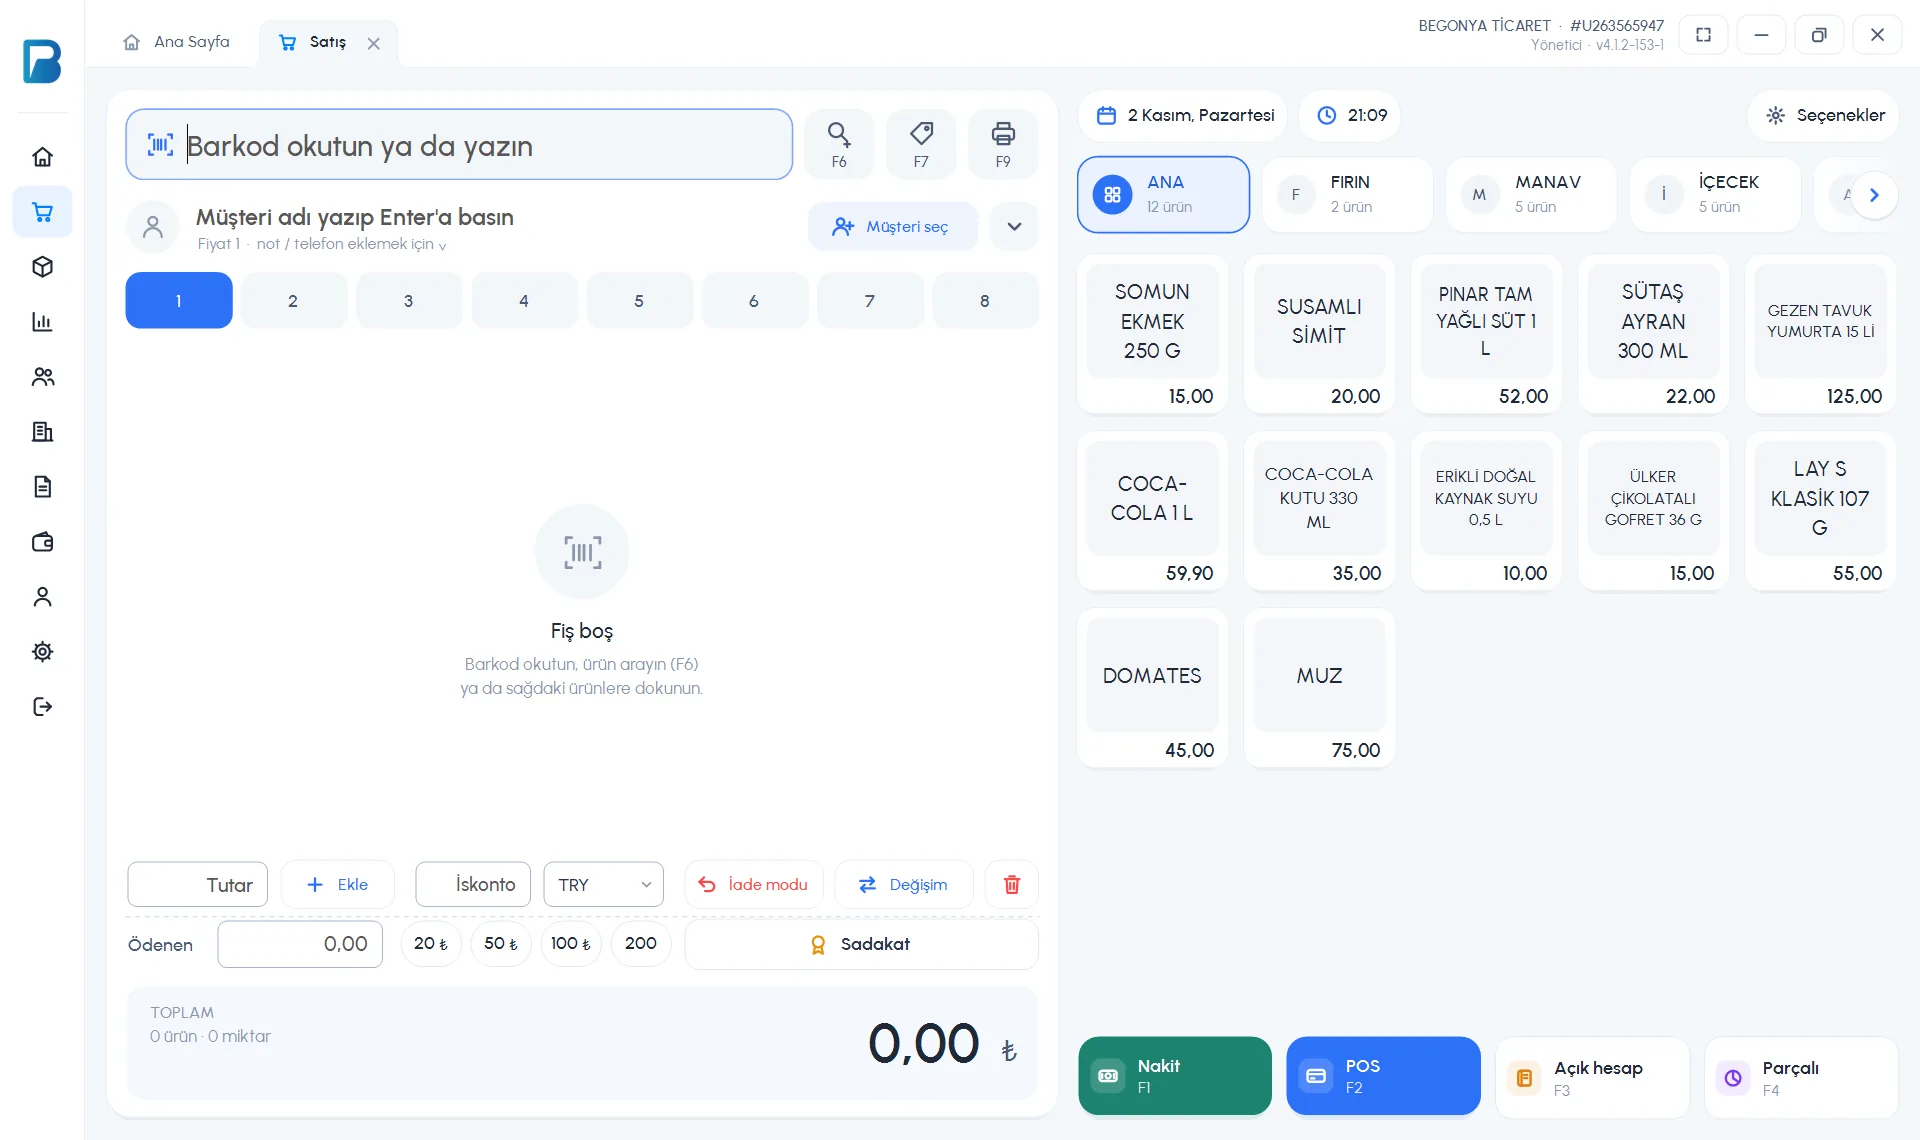 1
Scan the products
First, with 1 Return selected, scan the products the customer brought back, then press New and scan the products they are taking instead. You can also switch by clicking a list heading. 2 Returned items appear at the top and new items below. 3 The total box shows Customer pays, Pay to customer or No difference, and the difference amount.
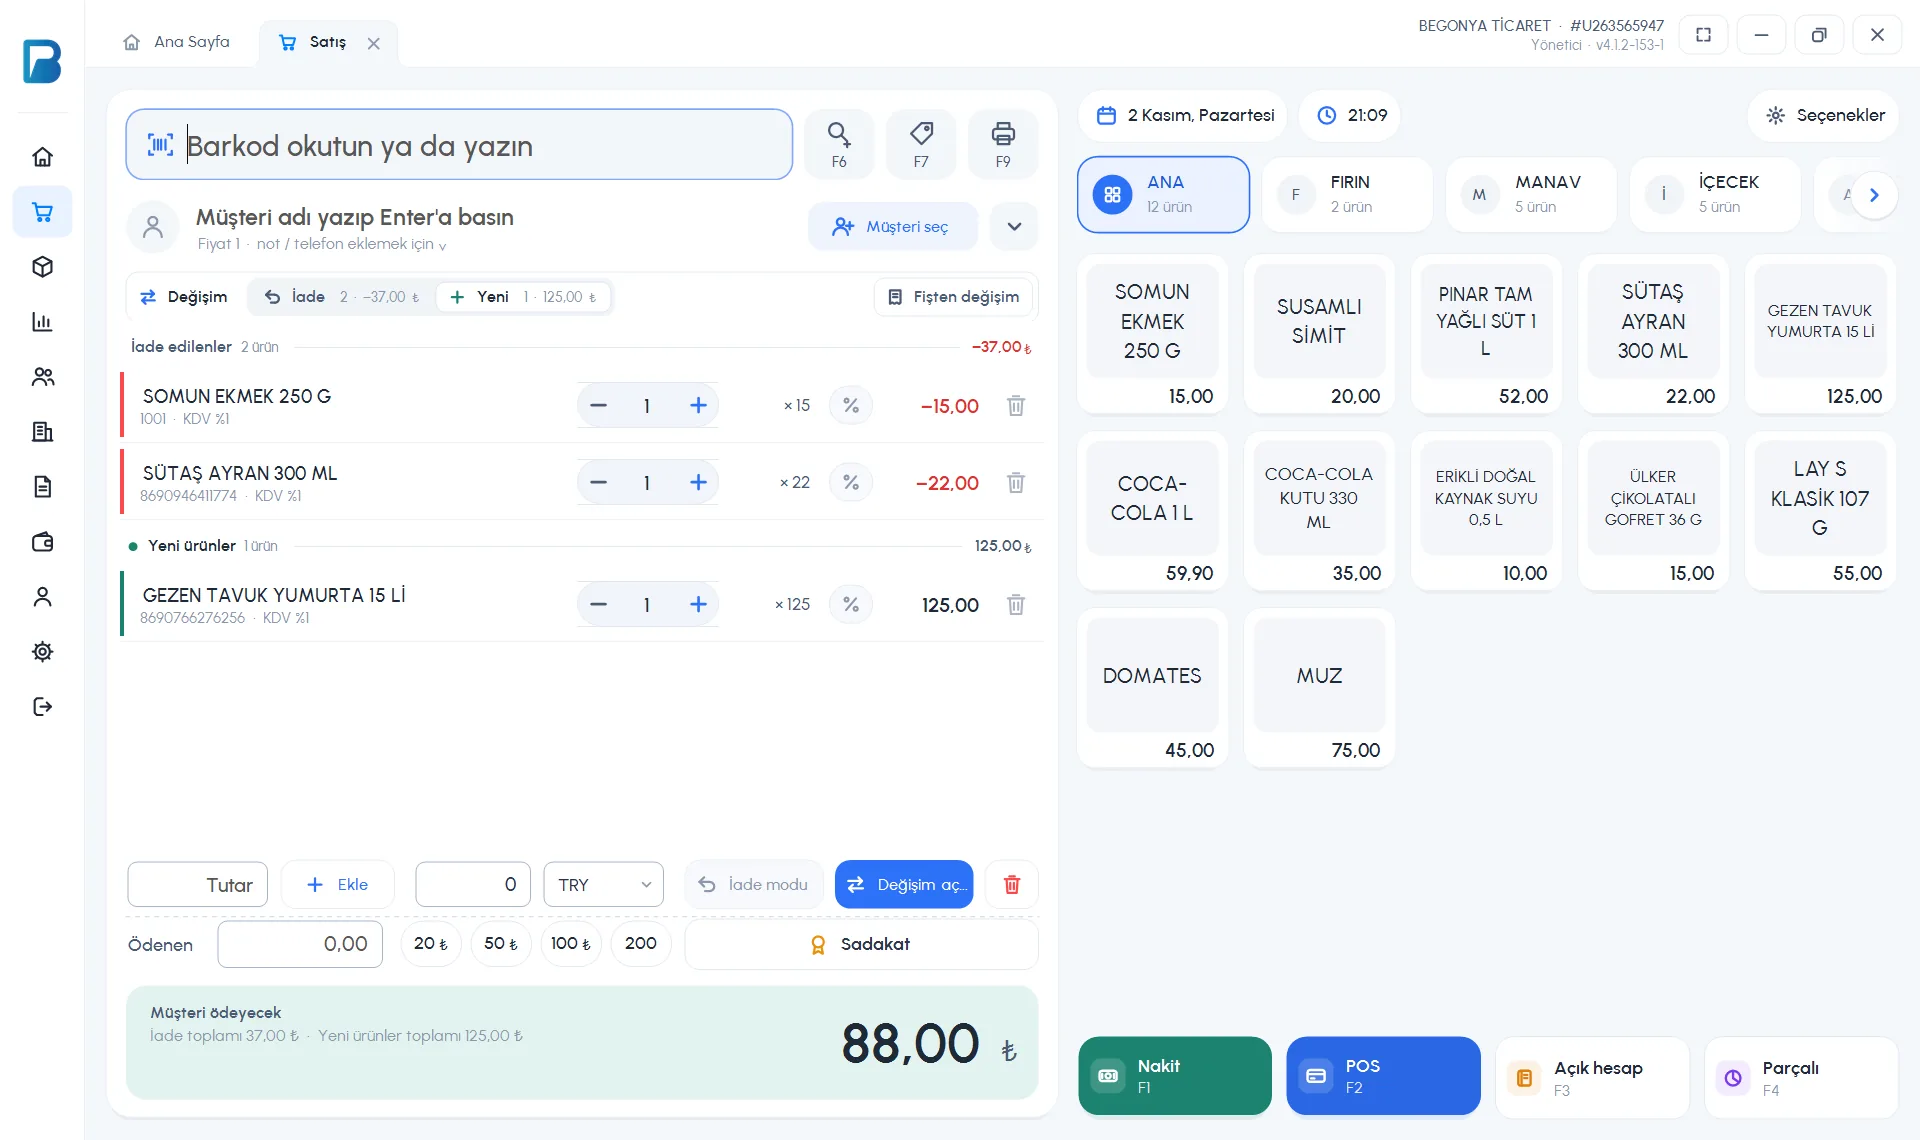 123
Complete the exchange
If the customer has to pay the difference, take it with the usual payment buttons. If the customer gets money back, the total box shows 1 Pay to customer and the 2 Cash and Card buttons show Refund; press the one that matches how you give the money back. The exchange is saved right away, the receipt is cleared, and an Exchange completed notification with the return and sale codes appears at the top right.
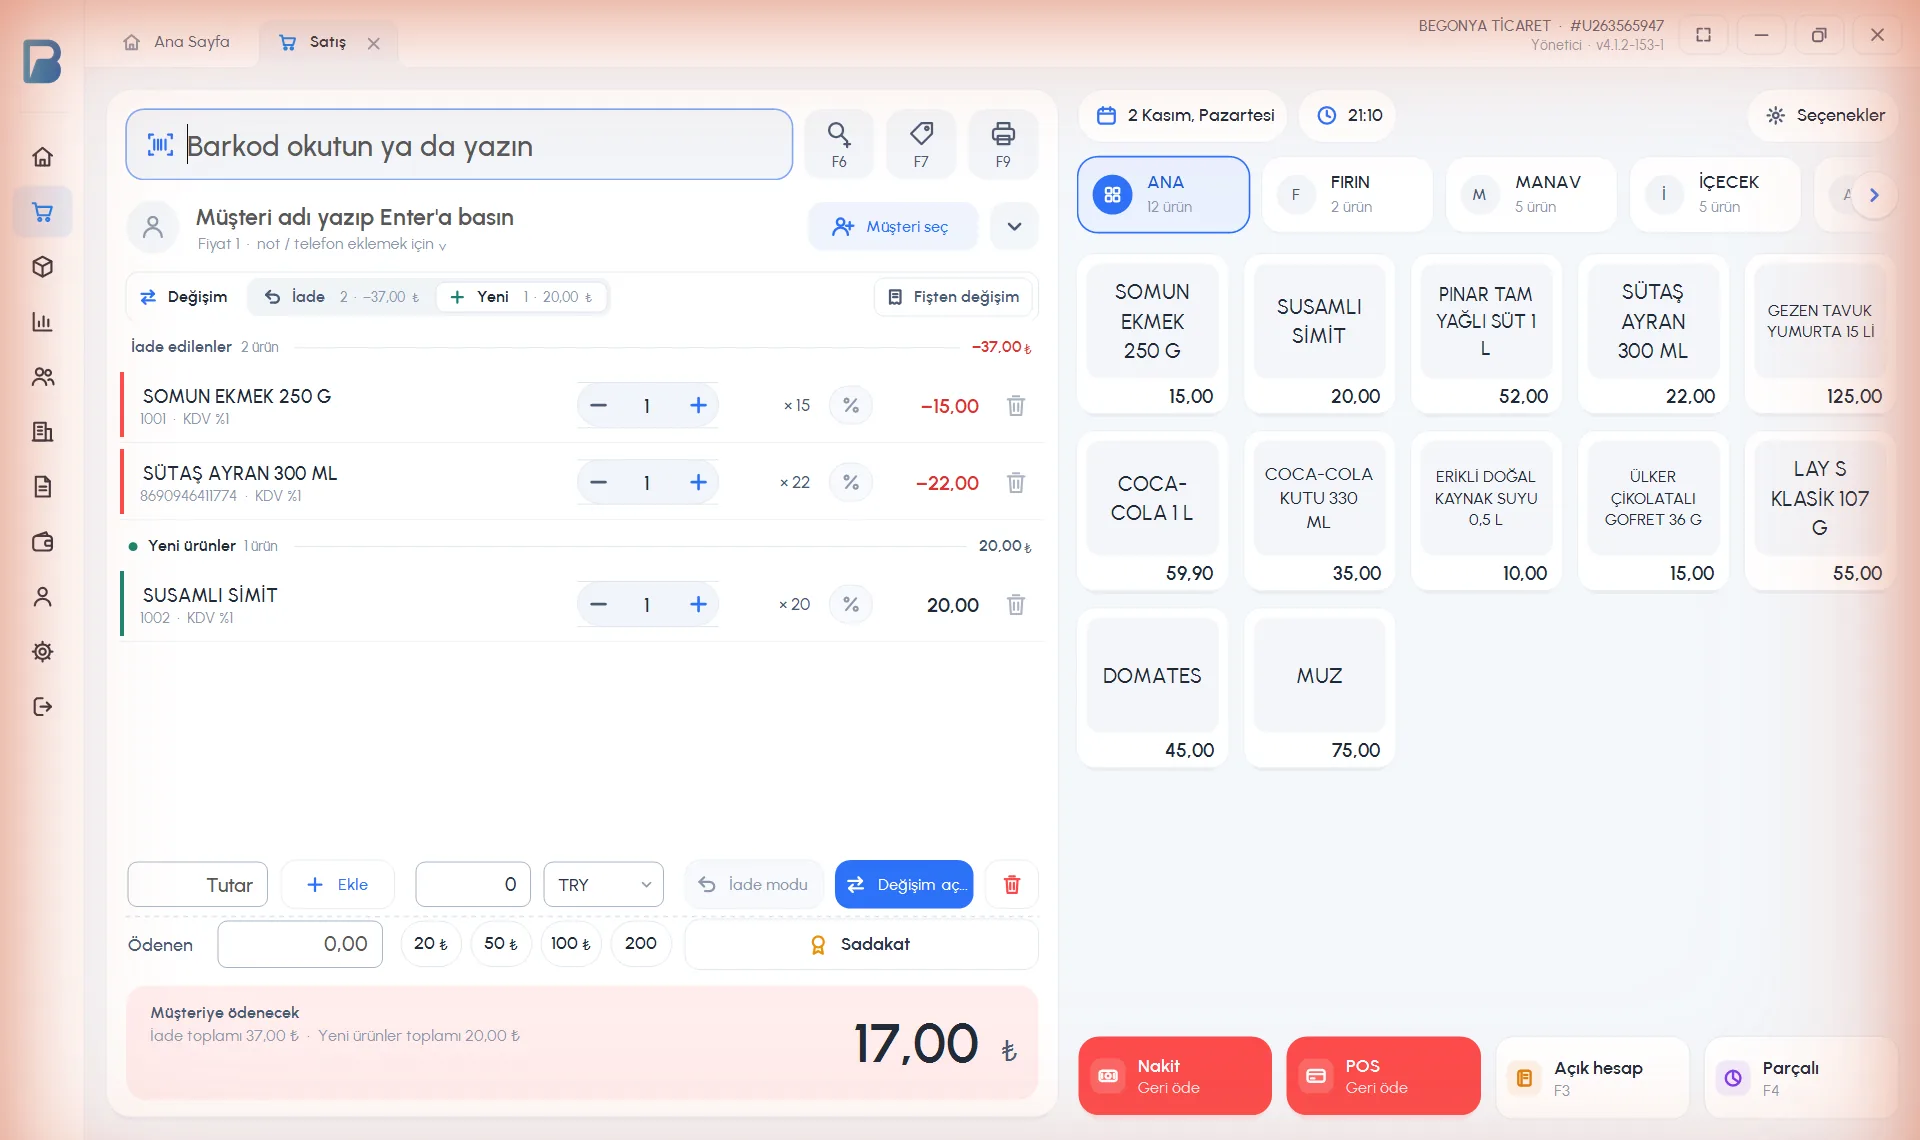 12
- If the customer brought the receipt, select it with Exchange from receipt on the bar; products are returned at the price paid on the receipt. Once a receipt is selected, 1 its code is shown on the bar. 2 Only products on that receipt can be returned, up to the quantity on the receipt.
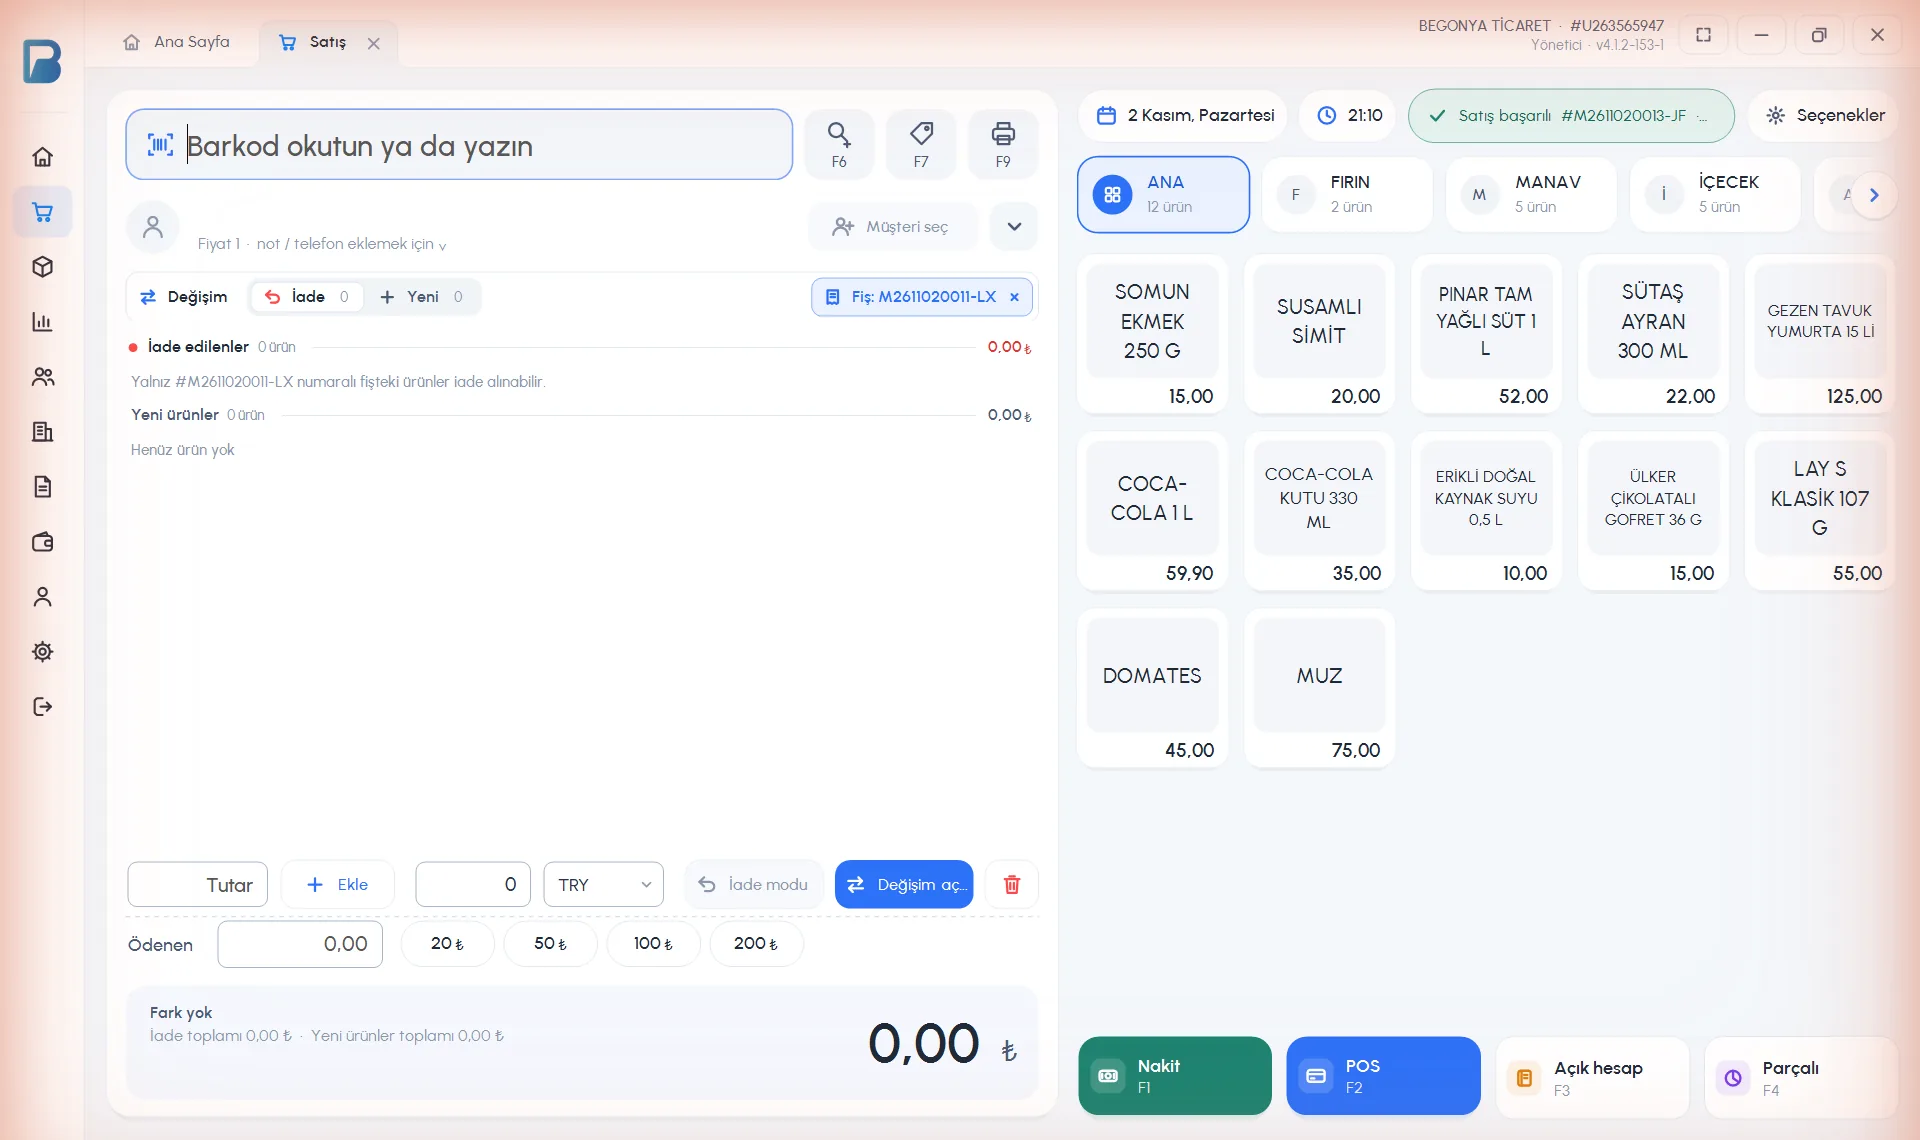 12
- To leave exchange, press the Exchange button again; if there are products on the receipt, you are asked to confirm and the receipt is cleared.
Exchange records are not sent automatically to the fiscal cash register (ÖKC) or the POS device. If needed, send them by hand from the sale details.