


How do I design a label?
Choose the products, design your roll or A4 label by drag and drop, save it, preview and download.
If you want to design your own label instead of using the ready templates, use the Products › Design & Print Labels page. Your design is saved, so next time you only choose the products and print. To print quickly with the ready templates, see: How do I print shelf labels?
Choose the products
Add products
1 Scan the barcode or type the product name and pick it from the suggestions; for several labels of the same product type
12*barcode. To add many at once, use 2 Add from group or 3 Price changed.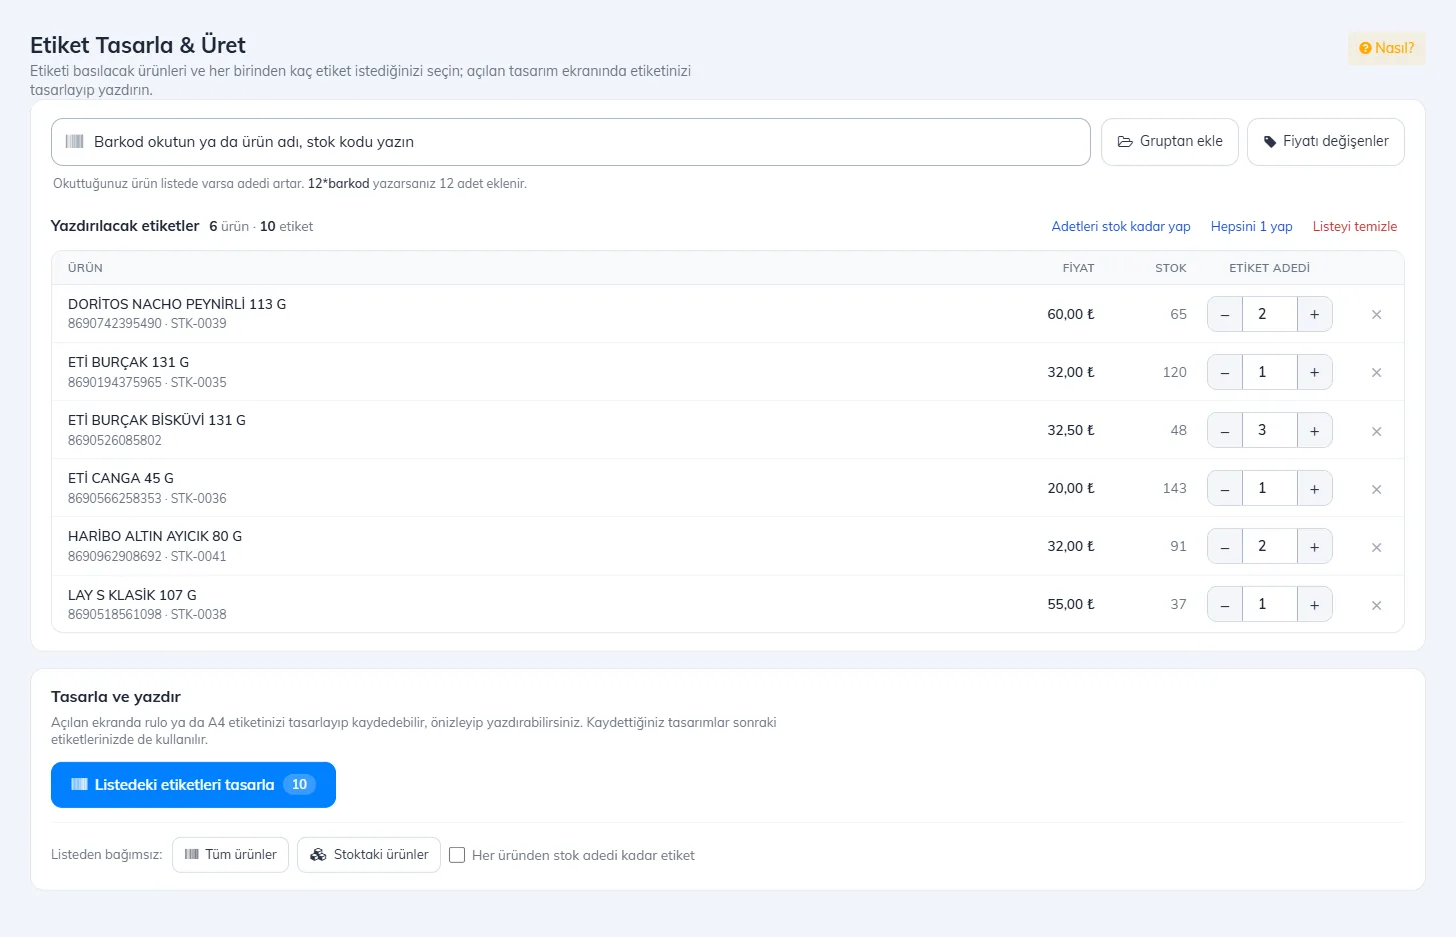 123456
Check the quantities
4 Set how many labels to print for each product. This list is shared with the Print Product Labels page; for details on choosing products see How do I print shelf labels?
Open the design screen
Press 5 Design labels in the list. You can also open it without the list using 6 All products or Products in stock. If As many labels as stock for each product next to them is ticked, each product gets as many labels as its stock: at most 999 per product and 5000 in total; products sold by weight or with no stock get 1.
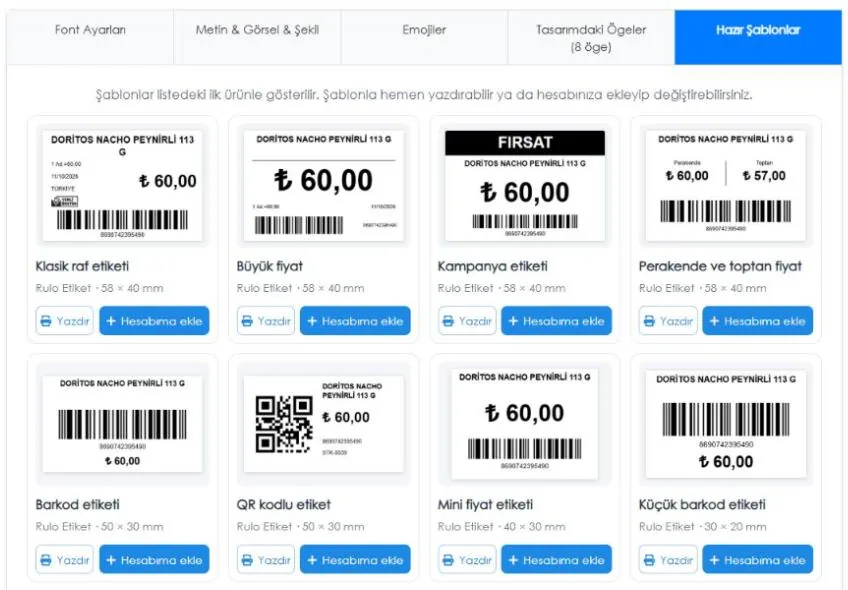
Start with a ready-made template
The 1 Ready-made Templates tab on the design screen has templates for roll and A4 labels, each shown with the first product in the list. 2 Print prepares a PDF of the products in the list with that template right away; your own design does not change. 3 Add to my account adds the template to your designs under a name and opens it, so you can change it as described below.
 123
Design the label
 12345678
Enter the label type and size
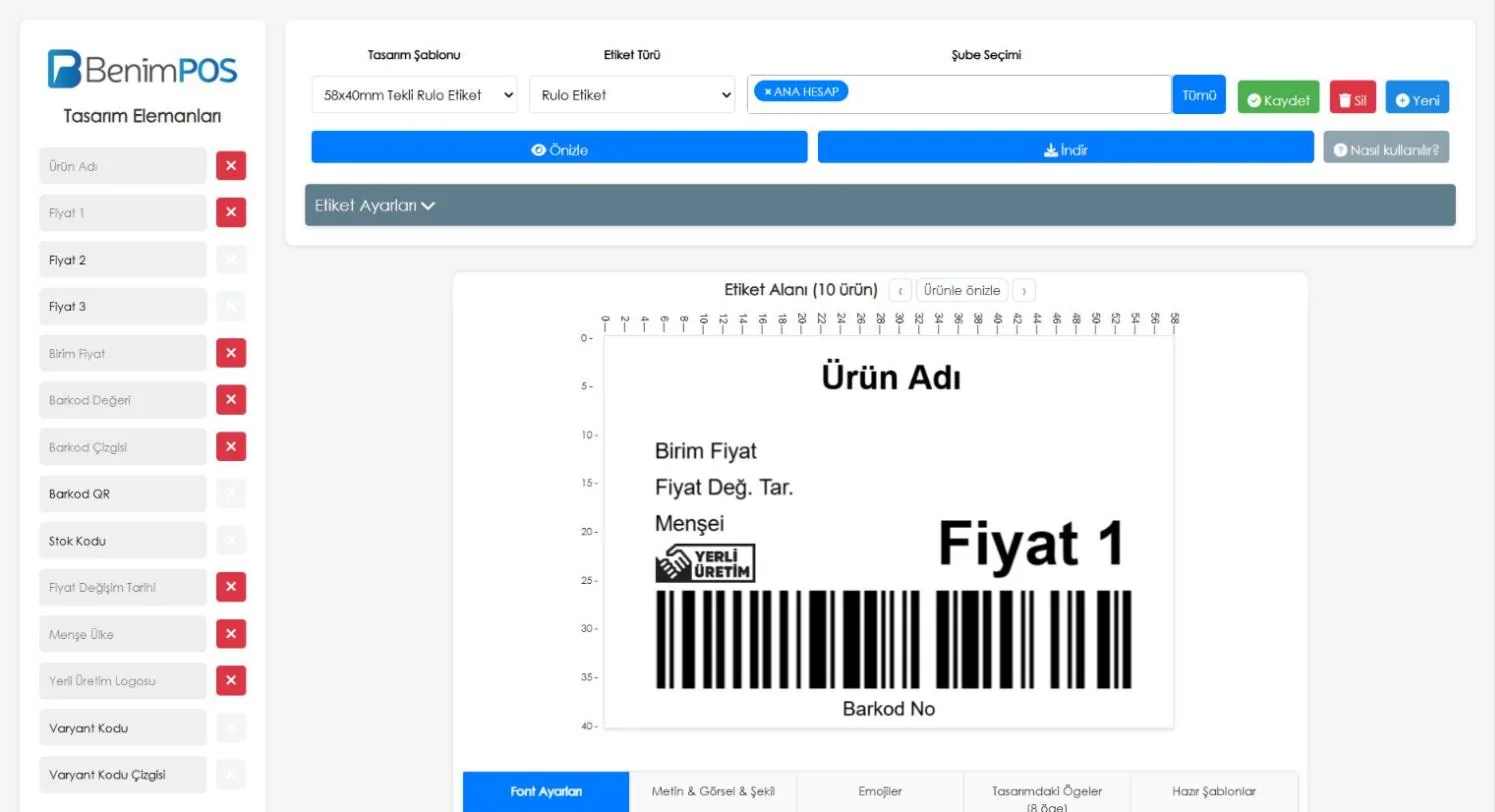
In 3 Label Type choose Roll Label for a label printer or A4 Adhesive Label Sheet. For roll labels, enter the label width and height (mm), how many labels are side by side and the gap between them in 6 Label Settings.
For 1 A4 Adhesive Label Sheet, enter 2 the number of labels across and down, the gaps between labels and the margins to match your sheet. If you print on a partly used sheet, enter the position of the first empty label in 3 Start Label.
If your sheet has a common size, pick it in 4 Preset size; the fields are filled in for you and you can adjust them. Roll labels have the same list. If the labels you entered do not fit on an A4 page, a warning appears.
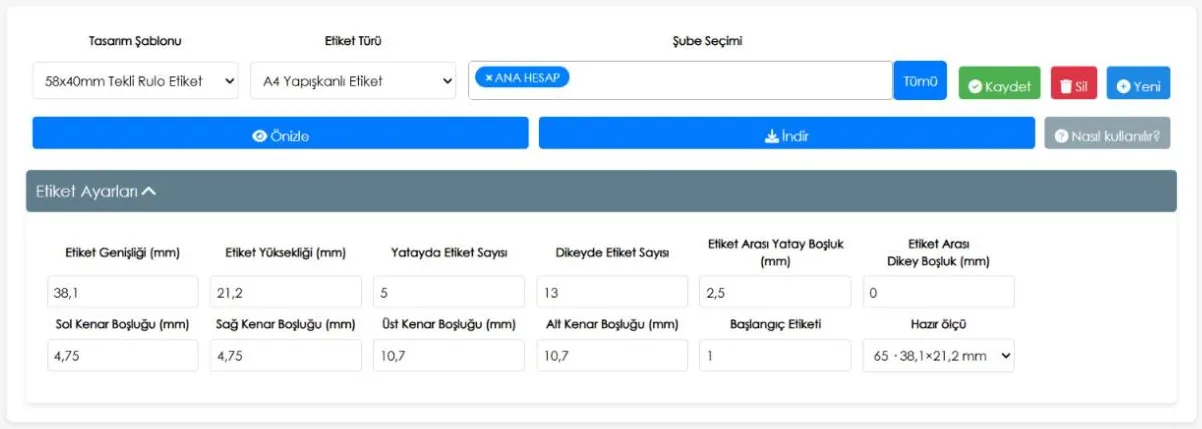 1234
Place the information on the label
Drag what you need from 1 Design Elements onto 7 the label area: product name, price 1 / 2 / 3, unit price, barcode number, barcode lines, barcode QR, SKU, price change date, country of origin, local production logo, variant code and its barcode. Move items by dragging and resize them by pulling their corners; the × next to an item in the list removes it from the label. Arrow keys move the selected item by 1 mm, with Shift by 0.1 mm. Undo with Ctrl+Z and redo with Ctrl+Y.
Add text, shapes and images
The tabs below the label area:
- Font Settings: font, bold / italic / underline, alignment, size and colour of the selected item. In the row below, Fill gives a shape or text a background colour (e.g. a white price on black); bring to front / send to back and undo / redo are also here.
- Text, Image & Shape: static text (e.g. "New price"), an image such as your logo, solid or dashed lines, rectangles, squares and circles.
- Emojis: adds emojis to the label.
- Elements in Design: all items on the label; you can select and delete them here.
- Ready-made Templates: ready designs; print with a template or add it to your account (see above).
Save the design
4 New asks for a name and saves the design; keep later changes with Save and remove a design you no longer need with Delete. Switch between saved designs in the 2 Design Template list. If you have several branches, choose which branches can use the design with Branch Selection.
Check with your products
Use 8 ‹ and › to see the label with each product in the list. A long product name shrinks to fit in two lines and the price in one line; the barcode stays inside its box. Click the label to return to the design.
Preview and download
5 Preview shows the labels as a PDF and Download saves the PDF to your computer. These buttons appear when you open the screen with products selected.
When printing the PDF, set the scale to Actual size (100%); Fit shrinks the label and it no longer lines up with the labels on the sheet. For roll labels, set the paper size in the printer settings to your label size.
Before printing on an A4 label sheet for the first time, print one page on plain paper and hold it over the label sheet to check the alignment. If it is off, adjust the margins a millimetre at a time.